2009年11月8日星期日

Smiths' New Idea for Thanksgiving Family Reunion Party - Make DVD Slideshow as Background

Thanksgiving Day is coming! In the parlor, the Smiths are discussing how to make the precious Thanksgiving family reunion party nice, colorful and unforgettable? Sh…listen! What are they saying?

Father: Novel decorations?


Mother: Cute cookies?

Daughter, the high school student says mysteriously: Good ideas, but not best ones! What I suggest is - make DVD slideshow as background for our Thanksgiving family reunion party!


Father and Mother: wow!!!

Daughter (excitedly): Yes, make our own family DVD slideshow for Thanksgiving party! How happy is the moment when family members reunite together. At this moment a joyful party is what we expected so much! Novel decorations and cute cookies are good, but may not cool enough. A family DVD slideshow as the background for the party is more exciting and must be able to strike a responsive chord in everyone's hearts.


Father : That sounds interesting! Go on, dear!


Daughter (proudly): Thank you, Dad! There are two major benefits for us to use a DVD slideshow as the background of our Thanksgiving family reunion party.

First, it will strengthen the lifesome and warm atmosphere of family reunion. We can collect photos from Grandpa, Grandma, Uncle, Auntie, Brother, etc, and then make them a DVD movie played on our big TV. When they come to our party, they must be touched by the vivid show. Happy moment comes! Right?

Mother: uh…let me see…see….


Daughter: Mom, there is another point! We can also take this DVD slideshow as a novel and meaningful Thanksgiving gift for family members. Cookies will be eaten up; decorations will be torn out after the festival, but the DVD slideshow can be preserved for a long time and played repeatedly. Even Grandparents can easily play this slideshow on TV with DVD player when they miss us.

Family reunion is for the love between family members and friends. We can make DVD slideshow with our own photos, stories, and words. Let's imagine: happy holiday, dear family members and the precious moments! Don't you think it makes more sense?

Father: Great! That really sounds touching and exciting. But I don't know how to make such DVD slideshow.

Mother: oh, genius! Dear, I can't agree with you more. I have already been touched once I think of the occasion. Well, is it hard to make such a DVD slideshow?

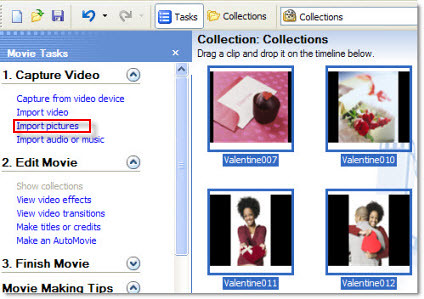
Daughter (confidently): Dad, Mom, it's just a piece of cake! Listen to my plan. Now that we have already got PowerPoint, I intend to make full use of it to make this DVD slideshow. Apart from PowerPoint, I just need a PowerPoint to DVD burner. Only these two little applications!

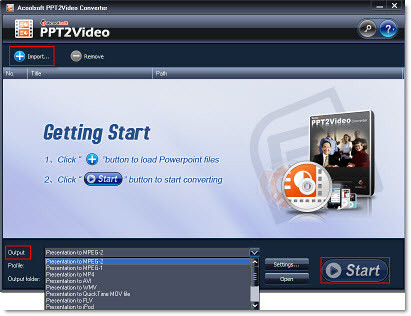
First I will make the slideshow with PowerPoint. You know I'm good at this tool and also I have many PowerPoint tutorials and Thanksgiving PowerPoint templates as references. The next and also the last step is to burn the PowerPoint slideshow to a DVD. I have tried some software like Acoolsoft PowerPoint to DVD burner. The conversion result is really satisfying.

In a word, everything is easy to do. Dad, Mom, I have said so much, while how do you think of this idea for our Thanksgiving party?


Father : Bravo! Oh, dear, that's perfect, isn't? Darling (turn to his wife), what's your opinion? ...Darling?

Daughter: Strange, where is Mom? ...Mom!
....
(Beside the telephone in the bedroom)

"Hi, Dad, could you please send me the photos you took with my Mom in California? I …" Mom says, making the telephone call.

Further reading:

PowerPoint 2007 to DVD - Two Effective Ways for You

PowerPoint to movie - Top 3 Methods about PowerPoint to Movie Conversion

2009年7月9日星期四

Convert PowerPoint to YouTube Video for Free - Free Acoolsoft PPT2YouTube

For many reasons, you may want to upload your PowerPoint to YouTube. Such as the following situation:
1. Broadcast yourself on YouTube with a promotional PowerPoint presentation
2. Advertise your product or company with PowerPoint on YouTube
3. Share your unique or funny presentation on YouTube with millions of people
4. Upload PowerPoint to YouTube as an alternative solution to share PPT with friends and families who are not in the same place with you
5. Enable your PowerPoint to be viewed without the need of Microsoft PowerPoint

But How to Upload PowerPoint to YouTube
PowerPoint is not in a video format that YouTube accepts. The mainly video formats that YouTube accepts are MPEG, MOV, AVI, FLV and MP4. So, for uploading PowerPoint to YouTube, you will need to convert your PowerPoint to one of the video format first.

Free Acoolsoft PPT2YouTube is just a tool which can help users directly convert PowerPoint to a YouTube video for free. The output MP4 video file will retain all visual elements and animation effects in the original PPT.


After you convert your PowerPoint to MP4 video with Free Acoolsoft PPT2YouTube, the next step is to upload the video to YouTube. Here are the steps:
1. Click "Upload Videos “in the upper-right-hand corner of any YouTube page.
2. Enter as much information about your video as possible, including Title, Description, Tags, and Category. The more information you include, the easier it is for users to find your video!
3. Determine if you want your video set to Public or Private.
4. Click the "Continue Uploading “button.
5. In the next window, click the "Browse “button to browse for the video file. Select the file you want to upload.
6. Click the "Upload Video" button.

If you have any PowerPoint presentations that want to upload to YouTube, just try this Free PPT2YouTube tool. Convert your PowerPoint to a YouTube video for free and enjoy yourself with this fun.

2009年6月19日星期五

How to Make an Exquisite Baby DVD Slideshow with Music

It’s important to capture the happiness and beauty of your child as she grows from day to day. Babies’ cute fingers, toes, teeth and faces always make us feel warm and happy. Take photos of your baby is not only enjoyment, but also a good record of her early years. An exquisite baby DVD slideshow can be a precious gift to them as your baby grows up.

As a baby DVD slideshow always include many photos of your baby, knowing how to take the best photos of your baby is necessary. Here is an article introduces 7 tips on baby photography. Hope these tips would help more or less. Before making a DVD slideshow for your baby, select and locate your baby’s photo in a new folder on your computer. This will bring you a lot convenience. Now, take the following steps to make the DVD slideshow.
What you will need: PowerPoint, a PowerPoint to DVD burning tool

Step 1: Import your baby’s photos into PowerPoint
Have you ever thought you can make photos look smart and edit photo shapes/frames in PowerPoint? Simply realize it like this: Open PowerPoint -> Insert -> Images -> Choose photos. Then double click a photo, you will see the Picture Tools options in the tool bar. In it, you can set the picture style and picture shape (frame). There are more than a hundred shapes for you. Compared with other photo editing tools, I think it is really convenient and easy.


Step 2: Add descriptions to your baby’s photo(s) - optional
Maybe you have some good wishes want to express to your baby, or some words want to add to a specific photo. Do it in these steps: choose Insert in the toolbar, then Text Box, finally input the words into it.

Step 3: Choose an appropriate song accompany with the DVD slideshow
Add song to your slideshow. Follow these steps: click Insert -> Sound -> Sound from file. Here are ten popular songs for you:
A Baby's Prayer Kathy Troccoli
A Mother's Prayer Celine Dion
Beautiful Boy Celine Dion
Handprints On The Wall Kenny Rogers
Isn't She Lovely Stevie Wonder
My Gift Michael O'Brien
My Treasure Mel Tunney
The Greatest Gift Steve & Annie Chapman
Tough Little Boys Gary Allan
You Bring Me Joy Carolyn Arends

Step4: Burn the PowerPoint to DVD for store and share
There is both free way and cost-effective ways for you to do this. Here is a PowerPoint backup to CD/DVD tutorial. You will get lots of advice from it. Just choose the one you like.

Make an exquisite DVD slideshow for your baby. Give your baby a meaningful babyhood. If there is a baby in your family, don’t hesitate to make one now.

Further reading:
PowerPoint 2007 to DVD - Two Effective Ways for You
PowerPoint to movie - Top 3 Methods about PowerPoint to Movie Conversion

2009年5月14日星期四

How to Make a Perfect Wedding Slideshow by Yourself

So you made it, the wedding is finally over and you and your new spouse want to make a slideshow of your big day. But do you really want to pay someone else to do it for you? Making a wedding slideshow yourself is now easier than you would ever believe. And it gives you more quality time to spend together.


Before making your wedding slideshow, you will need to choose a program. There are many tools you can use, but one tool I will recommend is PowerPoint. As it is easy to use, and it has a step by step guide when you are in the program. Your wedding photos, videos and songs can all be inserted into it.

As you may have lots of photographs and videos want to include in your wedding slideshow, one thing to do before you make your wedding slideshow with PowerPoint is to select photographs, video clips, songs and anything else you want to insert to your wedding slideshow. This also works as a great bonding opportunity and allows you to relive all of the moments of your wedding.

After that, directly import the photos, videos and songs into the PowerPoint or use the photo album function of PowerPoint to form your wedding slideshow. For details about how to do it step by step, you can reference this article.

Below are four useful tips that will help making your wedding slideshow more delicate.
1. Choose Quality Wedding Photos - Pictures that look great printed will also look great while scanned. Now it's more and more popular to use digital camera to take wedding photos.
2. Add short wedding video montage clips - Do you have any home videos sitting around gathering dust? Think about adding perhaps a 10-15 second wedding video clip in the middle of the wedding slide show.
3. Give some thought to music - Choose music that has meaning to you, music whose lyrics go well with the pictures. Slow romantic songs and Fast dancing songs will have different feeling and drive different emotion. As long as the pace of showing pictures are matching to the music.
4. DVD Menu - Creating a DVD menu is not a big task anymore. It will provide you to show your work in a more professional look and including your great pictures in your menu to indicate different episode.

For preserving your wedding slideshow for long-time use or distribute it to your families and friends, you’d better further burn the wedding slideshow you made with PowerPoint onto a DVD disc. Then only with a DVD disc, you can view your wedding slideshow on TV via a DVD player. For methods to burn your PowerPoint wedding slideshow to DVD, you can click here.

Use DVD wedding slideshow to record the most beautiful moment in your life. Have a sweet day everyday with your honey.

2009年5月7日星期四

Perfect Gifts for Mother’s Day

When it comes to Mother's Day, the best gifts aren't the fancy or expensive ones, but the ones given from the heart.


Stick to a modern Mother’s Day tradition for a safe gift choice. After all, almost every woman loves a chocolate and a bottle of wine. Do your research first: ask your dad what her favorites are, if you are not sure, and shop around for some gourmet confectionary that will make an extra special Mother’s Day gift, shop gourmet chocolates or other sweet treats online.

Following a close second behind traditional sweet and alcoholic goodies, a sentimental and thoughtful gesture will mean a great deal to your mum. Make a delicate digital photo album and fill it with photographs of your mother with you (and your siblings if you have any). To make this unique gift even more personalized, add a few words underneath each picture about your memories, or a Mother’s Day poem. Priceless!

Regarding the tools to create digital photo album, if you are happened to be a fan of PowerPoint, you can fully use the photo album function of it. Create a personalized photo album with PowerPoint is just as easy as ABC. Here are the 6 steps for creating an attractive digital photo album with PowerPoint 2007.

1. Open PowerPoint, on the Insert tab, click the Photo Album button, in the drop-down list, there is the New Photo Album option.


2. Insert pictures
Click File/Disc button. Choose pictures from your computer. You can change the order of a picture by choosing it and clicking the Move Up or Move Down button. Below the preview of the picture, you will be able to see six buttons, which you can use to adjust the rotation, contrast and brightness of each picture.


3. Create album layout
Under Album Layout, by clicking Picture layout arrow, and then in the drop-down list, you can choose the layout format you like. By clicking Frame Shape arrow, in the drop-down list of it you can choose the frame you want to add to your pictures.

4. Create title and subtitle for your album
After you have clicked Create button, on Slide 1, type the title you want for your album in the place of the words of Photo Album. Then if necessary, give your album a subtitle by inputting it in the place of your user name.

5. Apply a theme to your photo album
On the Design tab of PowerPoint, in the Themes area, select a theme that meets the need of your album.
Or you can also customize the look of your album by choosing a theme from your computer. Here are some free PowerPoint templates for Mother’s Day.

After finish making the photo album with PowerPoint, the next step is to burn it onto a CD/DVD. Finally send it to the dearest mum. Here is an article introduces 5 ways to burn a PowerPoint file onto DVD, follow the instructions, and you will surely find one way works fine with you.

Surprise your mum with an unusual gift on Mother’s Day. Express how deeply you love your mum.

2009年3月15日星期日

Free PowerPoint Templates for Easter’s Day

Easter is observed on a Sunday between March 22 and April 25. It is a religious holiday that commemorates the resurrection of Jesus Christ three days after his death by crucifixion some 2000 years ago. For Christians, Easter is a day of religious services and the gathering of family.
For the year 2009, Easter Sunday celebrations fall on 12th April.
If you need to make some presentations for Easter day or make photo albums with PowerPoint for your family reunion, these free PowerPoint templates for Easter’s day hope would help you do better.


For more free PowerPoint templates for Easter’s day, you can click here.

After making your presentations, if you need to further convert your PowerPoint to video for viewing presentations on portable devices or website and burn PowerPoint to DVD for distribution or broadcasting, you can click here.

2009年3月13日星期五

How to Share your PowerPoint Presentations in Multiple Ways

Many of us make PowerPoint presentations, no matter it is for family use, business use or education use. But not lots of us know that there are multiple ways to share PowerPoint presentations. The most common way to send presentations to others may through email or put it on a server somewhere for access. You may also package your presentation to CD for the members using PowerPoint viewer only.
But what if you want to
-> Run a looping presentation on a kiosk or at a tradeshow where PC is not available
-> Send the presentation to people who may not have PCs
-> Burn the presentation onto a DVD disc for distribution
-> Et cetera…?

Then it becomes a harder work. So how can you exactly share your information in the PowerPoint presentation? Here are some solutions for you.
1. Turn the presentation into a video to view on portable devices or website
Video is a media which could be broadcasted through many players. It can display your presentations in a more vivid way. With PowerPoint in video format, it is easy for uploading to your own blog and websites. Even there is no PowerPoint installed computers, you can also view your presentations through iPhone, iPod and all kinds of media player.


If take full advantages of PowerPoint, product advertisement can also made with it. Then with the PowerPoint product advertisement in video format, you can upload it to websites for more people to get familiar with your products.
As to the tools that can help convert a PowerPoint presentation to video, there are many programs out there. Unfortunately, I haven’t tried all of these. But here is one that looks promising. Although it is not free, if it does what you want it is worth looking into: PPT2Video Converter. For more ways about how to convert PowerPoint to video, you can click here.

2. Save and store PowerPoint presentation in CDs for distribution or broadcasting
If you have made precious photo albums with PowerPoint, saving them onto a CD would be meaningful. Family genealogy and other interesting events can all be widely shared with other family members who have no PCs and stored for long term preserve.
Useful courseware made with PowerPoint can also be distributed to fellows and students after being burned to CD/DVD.
Besides, PowerPoint product advertisement if saved in CD, it is possible to be viewed on a kiosk or at a tradeshow when there is no PC.

For programs to burn PowerPoint to CD, there is always Camtasia that will turn a PPT into a video/audio presentation, then with another program to make the video/audio presentation into a DVD. But if just for the function of burning PowerPoint to DVD, there are some better choices such as these ones: http://ppt-to-dvd.com/ppt2dvd/overview.html ; http://ppt-to-video.com/powerpoint-to-dvd-overview.html .
If you want to learn more ways about how to burn PowerPoint to DVD, you can click here.

3. Convert PowerPoint presentations to web-accessible presentations
There are a lot of ways to do this. One of them is converting PowerPoint presentations to HTML version. Open your PowerPoint first, and then click Save As in the Office Button. In the drop-down menu of Other Formats, choose Webpage.


Another effective way to do this is to upload your PowerPoint to video sharing websites such as YouTube. For more notes about how to share PowerPoint on YouTube, you can click here.

The next time you want to share your PowerPoint with others, don’t bother too much then. Just take the above suggestions into consideration. And use PowerPoint to boom your sales if necessary.

2009年2月16日星期一

5 Ways to Convert PowerPoint to Video

Benefits of PowerPoint
PowerPoint is a powerful presentation application which is very commonly used by lectures, businessmen, students, trainers, etc. It is easy to use and featured with a lot of functions to create interesting and dynamic slide presentations. This has made it widely accepted and utilized.

Benefits of Video
Video is powerful because it’s demonstrative, clearly depicting procedures, techniques or visual information such as charts and graphs. Most of all, video showcases charisma of live images and animations, allows for transparency and communication skills, which can lead to trust. It is also a good idea to make videos for special occasions as a way of watching them and reminiscing the good times.

Benefits of converting PowerPoint presentations to video
-> Display your presentations in a more vivid way
-> With PowerPoint in video format, it is easy for uploading to blog and websites
-> Even there is no computer, you can also view your presentations
-> Videos can be uploaded to portable devices such as iPhone, iPod and Pocket PC

5 Ways to Convert PowerPoint Presentations to Video (free ways and cost-effective ways)
Method 1: Upload your presentations to http://www.slideshare.netwhich is one of the world’s largest communities for sharing presentations. It can generate video for your presentations.
After uploading your presentations onto it, you can directly download the generated video onto your own computer, or embed the video to your blog.

But there are limitations to the presentations uploaded to it. Max size of the presentation is limited to 100MB; animations, video clips and other complex elements couldn’t be added; PowerPoint 2007 is not supported. Sometimes, objects inserted into the presentation may be modified after the uploading.

Some other similar online PowerPoint sharing sites such as http://www.authorstream.com and http://www.slideboom.com/ also support generate video for the presentations uploaded. The advantage is that you don’t need to download any programs onto your computer and they are all free. If your presentation’s size is not too big, and there are only texts and pictures in your presentation, you can have a try at these sites.

Method 2: Use Camtasia which costs $299 to record your presentation and then generate a video
Step1: In the Task List, select Record PowerPoint.
Step2: Open a PowerPoint presentation to record.
Step3: Select the recording options from the PowerPoint Add-in Toolbar. Click the Record button.
Step4: The presentation opens in presentation mode. A Camtasia Studio dialog opens in the lower right corner of the screen. Click the Click to begin recording button.

Step5: Progress through the PowerPoint presentation slides. To stop the recording before the last slide, press . To stop the recording at the end of the presentation, click Stop recording.
Step6: Enter a file name and location and click Save. The presentation recording saves as a Camtasia Studio recording file.
Advantages with this method: The program can capture slide timing, animations, sound effects, webcam video and any applications displayed on screen during the presentation. You can also record your own narration while the screen-capture process is being carried out.
Disadvantages: This program eats huge system resources. If the configuration of your computer is not so good, animations may become laggy or even lost.

Method 3: Convert PowerPoint presentation to video with Acoolsoft PPT2Video Converter
Step1: Download this PPT2Video Converter and install it on your computer.
Step2: Launch the program. Click Import button to choose the presentation you want to convert, choose an output format for the video you want to generate. And then click Start button to start the conversion process. (This program can convert presentations to video in MPEG, AVI, MP4, WMV, 3GP, FLV and MOV.)

Step3: Upload the video to blogs or websites such as YouTube.

Method 4: Use Windows Movie Maker to create a video for your presentations
Windows Movie Maker comes with all Windows XP and Vista installed computers. With this method, it may time consuming and animations in your presentation would be lost after the conversion.
Step1: Save your PowerPoint slide show as “PNG” images.

Step2: Import the images to your Windows Movie Maker.
Step3: Select all the imported images and then add them to Storyboard.

Step4: Add video effects to the slides (Optional)
Step5: Save the slide show as Movie File.

Method 5: Make a QuickTime movie on Mac
Export your presentation as a QuickTime movie “PowerPoint Movie”. Then you can save your presentations to MOV video file. Way to do this: click File -> Make Movie
But in this way, sounds and animations couldn’t be retained. If you are using keynote, just export your presentation to QuickTime file directly.

Take the advantages of PowerPoint and video. Convert your presentations to video. Share your presentation with more people and create a more convenient way to view your presentations.

2009年2月6日星期五

Valentine Gift Ideas for Your Beloved

Valentine's Day is a holiday celebrated by many lovers all over the world, what you plan to do as the Valentine's Day approaches? Presenting flowers, exchanging confectionery, or sending Valentine's cards? This exceptional day of lovers allows everyone to give out the most fascinating things and speak up the never expressed things. Here are some perfect valentine gift ideas and tips that you can make your beloved happy.


There are plenty of options to choose. But before selecting any gifts for your beloved online, you need to put a lot of creativity, thinking and time. A gift for your beloved should largely depend on the personality of the individual. A Valentine Gift that suits the personality of your beloved will be considered as ideal.
1. Choose chocolates
If you want to make a great impression for your sweetheart on this Valentine, not to mention the feeling of cheerful surprise as your beloved receives this special valentine gift. You can choose heart-shaped chocolate, select a very romantic card and add some sweet message in it, then wrap it up to send to your beloved. This chocolate gift idea for your sweetheart promises to make her love you forever.

2. Choose candy
Surprise your Valentine with a gem of a candy collection or candy gift baskets. Candy gifts come in various types and categories suiting your sweetheart's mood and taste, not to mention affordability because candy would not be too expensive. With the aid of the various candy stores you can also order for various types of decorative candy boxes for your beloved. You can gift your spouse with a special candy bouquet.

3. Choose flowers
The meaning and beauty of flowers has captured our imagination so much that even words cannot match its power when it comes to expressing love. The perfect choice of a Valentine flower is the red roses, distinctly expressing love in its eternal form. The single stem of a rose also called “signature rose” is the most preferred choice of most Valentine lovers. Red, pink and white roses are the most sorts after Valentine Flowers. Red rose symbolizes passion, white purity and the pink rose is a blend of both.
For more flowers information you can browser Proflowers and Flowerpetal

4. Choose jewellery
Jewellery doesn't mean that it has to cost you a lot especially during the period of economic recession. My guess is she must be having many pairs of earrings and chains. So why not gift her something that she might just have one or even none. Select a nice anklet from a nearby jeweler and gift to her as a Valentine gift, you can select from different styles for her. So indulge yourself in this season of love with some great valentine jewellery ideas. Let your sweetheart remember you with this special moment lock inside her heart forever.

5. Record your romantic stories
Valentine's Day is a golden chance of expressing your love to your beloved. You can make up for all the time lost with great romance collage. Considering paper ones are easily damaged, you can create PowerPoint with snaps to cherish the memory of your love of joy. Under each Slide you can write a specific thing about your sweetheart, like "I miss your smile", "I miss you ". It will be a big fortune for you both. Presenting a sincere romance story in such a way could be an ideal Valentine's Day gift idea even if valentine flowers are not attached with it. For long-time preserve you can convert the PowerPoint to video or DVD instead papers. Here is a sample from YouTube http://www.youtube.com/watch?v=IbrOSNsNUWo . Want to know how to do it? You can click here. Here are also some free PowerPoint templates.
Below is a DVD Menu of the tool.

These are just part of my ideas, do you have any more? Please show it to your sweetheart this Valentine's Day.

2009年2月5日星期四

Free Valentine's Day PowerPoint Templates

Here are some free PowerPoint templates for Valentine's day:


For more free ones, you can Click Here.

2009年1月15日星期四

Plasma TV Used in School

Today’s children are growing up surrounded by television and video. Visual media is already an essential component of classroom instruction. Especially in recent years, plasma TV sets have been installed in more and more schools with the support from different educational agencies.


These plasma TVs are mostly designed for use in presentations, dynamic messaging, training and teleconferencing. Teachers can present courseware through plasma TVs and also some other types of training material. Students can get the latest school news and view other students’ good job. Thus, contribute greatly to both the teaching process and the construction of campus culture. Students can learn in an innovative way, and school introduces a new way to communicate with students.

Plasma TVs are usually connected to a DVD player, VCR, HDTV decoder set-top box, external audio connections, gaming services, and a PC. In most conditions, school use DVD players and PCs as the media. As a result of this, information that is to be presented through plasma TVs is commonly stored in video or DVD format.

The preparation wok of the material to be broadcasted could be huge and time-spent. If you are the person who has been assigned this task on campus, in which mean you would finish it. Maybe some of you may think that this task is a hard one which requires complex computer skills. Indeed, not everyone has a founded flash, programming skill, but with right tools, you can also make it easy.

Regarding the Powerful function that PowerPoint has, here is a way of how to make a video or DVD based upon it. Below are some advantages of doing so:
-> As PowerPoint is available on almost all computers at school, you don’t need to buy additional content authoring tools
-> PowerPoint is frequently used to prepare for courseware, teachers can operate it easily. No professional computer skills are required
-> Besides texts, you can also insert customized backgrounds, pictures, animations, movies and etc into a PowerPoint. It is ideal to form the content of your video

After you finish form the content of your video with PowerPoint, the next step is to convert it to video formats or burn it to onto DVD discs.
1. Turn the PowerPoint you made to video format, here are two ways for you
-> Use Windows Movie Maker which comes with all Windows XP and Vista installed computer
Step 1: Save your PowerPoint slide show as “PNG” images


Step 2: Import the pictures to your Windows Movie Maker


Step 3: Select all the imported images and add them to the Storyboard


Step 4: Add video effects to the slides (optional)


Step 5: Save the slide show as Movie File


-> Use some professional tools which will make this job easy such as Acoolsoft PPT2Video Converter.BTW, there are many other ways out there of converting your PowerPoint presentations to video, you may find more by searching on Google.

2. Burn the PowerPoint onto a DVD disc:
If your prefer DVD as the media, you may find many tools on Google. I wrote an article about burn PowerPoint to DVD, you can click here to read it. It introduces 5ways for you, including free ways and cost-effective ways.

With the tips mentioned above, I believe creating a video or DVD for your school is not as difficult as you think. Just play the video or DVD on the PC, your information could be viewed everywhere on the campus where the plasma TV is deployed.

2009年1月5日星期一

Video Resume Tips- How to Create a Successful Video Resume

The global financial crisis is now having an obvious impact on every walk of life. Unemployment in 30 of the world's wealthiest countries is expected to rise by some 8 million people in the next two years as the severest recession since the 1980s takes hold, according to an Economic Outlook report by the Organization for Economic Cooperation and Development. This translates into 42 million unemployed in OECD countries in 2010.


As vacancies continue to evaporate, competition for any job available will become fiercer. After the Christmas holiday, there surely will be a range of intense competition for vacant positions. Want to improve the efficiency of hunting a job? Want more companies get your profile? Here resumes play an important role in the first place.

Except traditional resumes, video resumes have now become one of the hottest new ways to showcase candidacy for a wide range of jobs. This is all due to the quick development of Internet. As a result of it, increasing number of people turn to Internet for old problems. Creating a resume video on YouTube might be the next wave in human resource acquisitions.

A video resume is just a way for job seekers to showcase their abilities beyond the capabilities of a traditional paper resume. The video resume allows prospective employers to see, hear and get a feel for how the applicant presents themselves.

As it how to create a professional video resume, you will get some tips in the following paragraphs. Instead of just using a camera to prepare for a video resume, here I would like to introduce a more perfect way. That is, do it with PowerPoint. Then upload the PowerPoint (in video format) to websites.

Here is a main benefit of doing so: Besides the video you created with your camera, you can also insert some other contents into your video resume with PowerPoint, such as texts (your written statements), pictures (photos of the awards you won), animations and other online videos. This could help show you more comprehensively.

Below are some respects you should pay attention to while capturing the video with camera:
-> Dress properly just as if you were going to an in-person interview
-> Eyes looking at the camera, don’t look around
-> Don’t speak too fast
-> Make sure there is no background noise
-> Discuss why you would be a good employee and what you can do for the company once you were hired
-> Focus on your professional endeavors, not your personal ones
-> The video should not be too long
-> If the video is not perfect, start over

Respects you should pay attention to when preparing the PowerPoint:
-> Use template effectively, since it is for your resume, business or simple style would be better
-> Present your topic by using key phrases
-> Limit the number of slides, too many slides would make prospective employers tired to view
-> Embedding suitable photos and charts could add variety
-> Make the Text’s color and background’s color contrastive
-> Make sure the voice of the video you captured is loud enough

After you finish creating your resume with PowerPoint, the next step is to convert the PowerPoint to video format so that you can upload the PowerPoint to websites. Here are two ways for you to do this:
1. Use some professional conversion tool to help you do this. When searching in Google, you will get lots of advises. When it comes to ease of use, a nice feature set and pure speed of solution, this tool: Acoolsoft PPT2Video Converter becomes a good choice. It is designed to help users convert PowerPoint to almost all popular video formats for easily uploaded to websites.

2. Use Camtasia – a screen video capture program. First save your PPT file in PPS format and set Camtasia studio to record the whole screen. Play your PowerPoint PPS file and Press F9 to start recording the screen. When you reach your last blank slide, Press F10 to stop the recording. After that, you will be prompted to save the captured slideshow, choose a directory and enter a filename for it. Finally, save your capture in AVI format.

Besides uploading your video resume to your own web site, blog and YouTube, there are also some other professional career networking sites, such as MyWorkster, CareerBuilder and Jobster. They all have a section of your profile where you can include video. It would be convenient for employers to view it. Also, you can include a link of your video resume in your paper/online resume to promote it.

Here is a YouTube video made with PowerPoint which introduces several great examples of resume objectives, summaries and profiles: http://www.youtube.com/watch?v=v3Lp8Ts27bM. Take a look and hope it would help you prepare a better resume.

In the new year, may everyone have a good job and a happy time.